Most people unbox a gaming chair, bolt the back onto the base, roll it in front of the monitor, and sit down. That is the entire setup process. Then hour four arrives, the lower back starts talking, and the chair gets blamed. Half the time the chair is fine and the setup is wrong.
An ergonomic gaming chair setup is four adjustments and about twenty minutes: lumbar height, seat depth, tilt tension, and armrest position. Nail those and a mid-priced chair out-supports an expensive one that is dialed in badly. Miss them and a good chair will still wreck your back by the end of a scrim day.
I have coached competitive FPS players for years, and I have watched back pain end more runs than bad aim ever did. This is the routine I make my players run before they are allowed to complain about a chair.
Why you should trust me
I am not a lab and I am not going to pretend to be one. I am a 29-year-old esports coach in Los Angeles who spent ten years doing ten-hour practice days, went through more chairs than I have trophies, and had a herniated disc scare at 24 that a physical therapist had to talk me out of. The chair that collapsed under me mid-match is the reason I check a base before I sit in it.
What I can tell you is what a chair has to do for a body that sits in it for eight hours, and which adjustments actually change how your back feels at hour six. That is the whole point of this guide.
The four checks that decide whether setup can save the chair
Before you spend twenty minutes dialing anything in, run these four checks. If a chair fails them, no amount of adjustment will fix it.
Adjustable lumbar support. A fixed bump sewn into the backrest is decoration. It sits wherever the factory put it, which is rarely where your lower back wants it. You want a pillow you can slide or a dial you can crank. Everything else on this list is secondary to this one.
Seat depth you can work with. How far the seat extends decides whether your knees bend properly. Too long and the edge digs into the back of your thighs and pulls you forward. Too short and your thighs hang with no support. If the seat is too long, a lumbar pillow placed behind you shortens the effective depth, which is a legitimate fix and not a hack.
Tilt tension and a lock. A serious chair lets you set how much it leans back and lock it at the angle that supports you. A chair that only reclines or only locks upright is a chair you will fight all day.
Armrests that move in more than one direction. Up and down only means you are choosing between shoulders that shrug and wrists that bend. Height, in and out, and angle is the minimum for a desk setup that does not hurt.
Mesh versus leatherette matters too, and it is the check people skip. Mesh breathes. Leatherette does not. If you play more than two hours at a stretch in a warm room, that difference shows up as a sweaty back by hour three.
Two chairs that take this setup well
Both of the chairs below have the adjustable pieces this routine needs. They solve different problems.
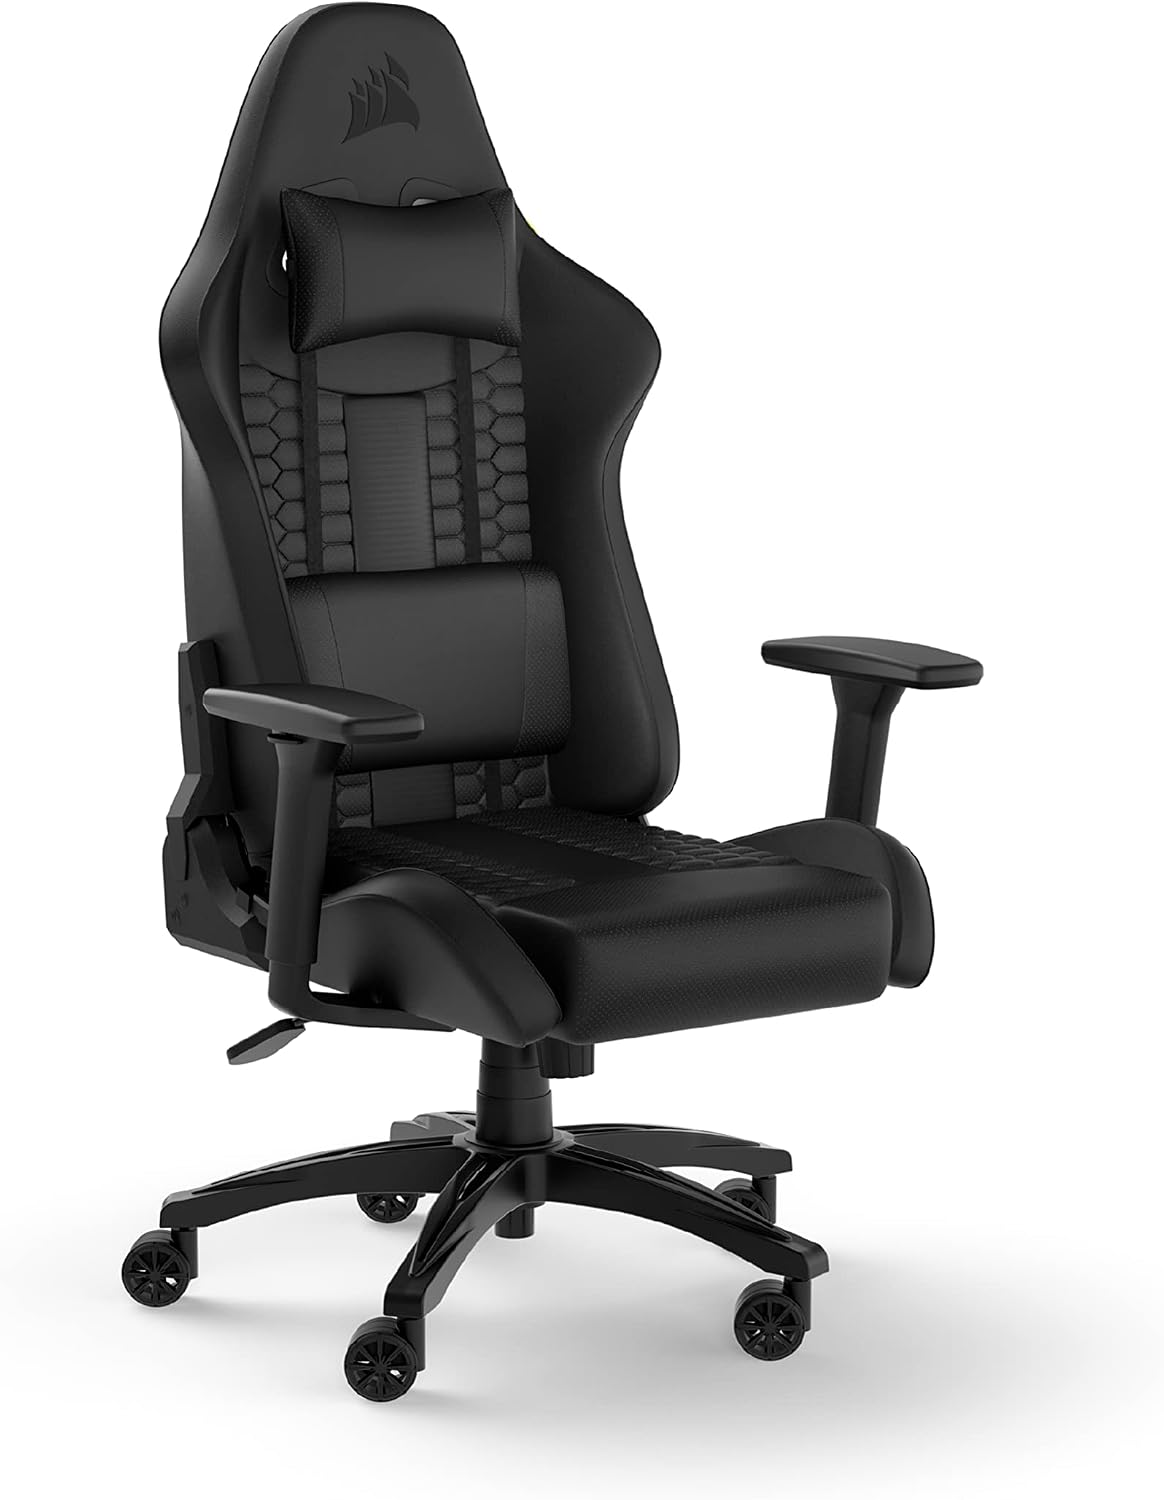
The relaxed-back pick: Corsair TC100 Relaxed Gaming Chair - Leatherette - Racing-Inspired Design - Lumbar Pillow - Detachable Memory Foam Neck Pillow - Adjustable Seat Height - Adjustable Armrests - Black
 Visit on Amazon →
I will say the uncomfortable part first, because I have spent years telling people to skip bucket seats: this chair is racing-inspired in its styling. The difference is the word relaxed. The seat is flatter and wider than a true bucket, which means your hips are not wedged into a channel and your knees can sit where they want. That is the version of the look I can live with.
What you get for the setup routine is a lumbar pillow you can move and a detachable memory foam neck pillow you can take off entirely, which is what I would do. Adjustable seat height and adjustable armrests cover the height and elbow steps. The armrests are not full 4D, so treat the angle step as a compromise rather than a dial.
Flaws but not dealbreakers: Leatherette in a Los Angeles summer is a warm seat. If your room runs hot, plan on shorter sessions or a fan pointed at your back. The lumbar support is a pillow, not a mechanism, so you tune it by repositioning it, and it will slide if you do not set it once and leave it.
Anyone who wants the racing silhouette but refuses to sit in a bucket will get along with this chair, and it is the easier of the two to set up for a smaller frame.
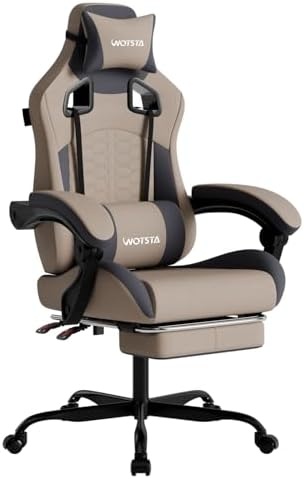
The marathon-session pick: Gaming Chair with Massage,Ergonomic PC Gaming Chair with Footrest Comfortable Headrest and Lumbar Support, High Back, 300LBS (Grey)
 Visit on Amazon →
This is the chair for the player who lives in a reclined position between matches. The footrest is the feature that matters most here, and not for the reason the listing suggests. You should not play with your legs up and your torso reclined, because that posture is a one-way ticket to a stiff lower back. You should use the footrest on breaks, reclined, to take load off the lumbar spine for five minutes every forty-five.
The high back and headrest give you a place to rest your skull without pushing your chin forward, and the lumbar support is the adjustable piece this whole routine depends on. The massage function is a novelty. It feels nice for ten minutes and then it is just a motor humming under your legs. Do not buy this chair for the massage and do not let it change how you sit.
Flaws but not dealbreakers: The grey fabric shows wear faster than black leatherette, and the massage motors add a failure point that has nothing to do with support. The footrest mechanism is also one more thing to check for wobble after a few months. The listing rates the chair to 300 pounds, so if you are near the top of that range, verify the dimensions in the listing before you commit.
Anyone who wants a high back, a headrest, and a footrest for real recovery breaks, and who will actually use them, gets the most out of this one.
The setup routine, step by step
Do these in order. Each one depends on the one before it, and doing them out of order means you will redo them.
Step one: seat height. Sit down and set the height so your feet are flat on the floor and your knees bend to roughly 90 degrees. Your hips should sit level with your knees or slightly above them. If your hips are below your knees, you are sitting in a bucket and your lower back is rounding. Raise the chair.
Step two: seat depth. Slide back until your back is against the backrest. You want two to three fingers of space between the back of your knee and the front edge of the seat. If there is more, the seat is too long and it will pull you forward all day. Put your lumbar pillow behind you and recheck. That is the fix for a deep seat.
Step three: lumbar height. This is the step everyone gets wrong. The curve belongs in the small of your back, roughly at your belt line, not up between your shoulder blades. Slide the pillow up or down until you feel contact right at the belt line when you sit up straight. If the pressure is in your mid back, it is too high, and it will push you forward within an hour.
Step four: recline and tilt tension. Set the chair so you can lean back to about 100 to 110 degrees between your torso and your thighs. Flat 90 degrees is not a neutral posture, it is a load on your discs. Loosen the tension until leaning back feels easy, then lock the angle if your chair allows it. If the chair springs you forward, tighten it. If you have to fight it to stay upright, loosen it.
Step five: armrests. Drop your shoulders and let your arms hang. Bend your elbows to about 90 degrees. The armrests should come up to just under your forearms so your shoulders stay down. If your shoulders are climbing toward your ears, the armrests are too high. If you are leaning to one side to reach a mouse, move the armrests in or out until your forearm rests on them without reaching.
Step six: headrest or neck pillow. The support belongs at the base of your skull. If it pushes your head forward, take it off. This is why the detachable neck pillow on the Corsair is a feature and not a missing part.
Step seven: the break protocol. Set a timer for forty-five minutes. When it goes off, recline, put your feet up if your chair has a footrest, and stay there for five minutes. This is not optional and it is not weakness. Static loading is what hurts you, and changing the angle resets the load.
Step eight: the one-week recheck. After a week, tighten every bolt you can reach, check the base for wobble, and sit down again to confirm the lumbar pillow has not migrated. A chair that wobbles after six months was usually a chair that was never re-tightened after the first week.
Fit checks by body type
Setup cannot fix a chair that is the wrong size, so check these before you buy.
If you are short, the seat depth is your enemy. Long seats push you forward and the lumbar pillow ends up in the wrong place no matter how you slide it. Look for a shorter seat and use the pillow to fine tune.
If you are tall, the backrest height and the headrest position decide whether the chair works. A headrest that lands at your neck instead of the base of your skull is a headrest you will remove.
If you are heavy, check the weight rating in the listing and check the base. A five-point base in a decent material holds up. A chair rated near your weight and nothing more will wobble sooner.
What this actually costs
The setup itself is free. Twenty minutes, no tools beyond what came in the box, and a timer. The only money in this article is the chair, and you can check current Amazon price at either link above before you decide.
The real math is the cost of skipping it. A disc scare at 24 cost me a season. Twenty minutes of adjustment costs you nothing.
The short version
Set the height so your hips are level with your knees. Set the depth so you have two to three fingers behind your knee. Put the lumbar curve at your belt line, not your mid back. Set the tilt so you sit at 100 to 110 degrees. Set the armrests so your shoulders stay down. Take a reclined break every forty-five minutes. Recheck the bolts in a week.
A gaming chair is a chair first and a gaming product second. If it does not support your back at hour six, it is a toy. Set it up properly and it stops being either one.