Most people treat an ergonomic gaming chair setup as a shopping decision. Buy the right box, assemble it, sit down, done. That is backwards, and it is why I have watched players spend real money on a chair and then sit in it like it is a park bench. The seat depth is wrong. The lumbar pad is three inches too low. The armrests are jammed under the desk at a height that rounds the shoulders forward for six straight hours.
The setup below takes about 15 minutes and costs nothing. It is the same sequence I run on any chair before a player on my roster is allowed to use it for a full scrim day, and it is the difference between a chair that supports you at hour six and a chair that just holds your weight while your lower back does all the work.
Why you should trust me
I coached competitive FPS for a decade, which means I spent years in 10-hour practice days. At 24 I had a herniated disc scare, and it did not come from lifting anything. It came from a racing-style bucket seat with a fixed lumbar bump that pressed into exactly the wrong part of my spine for months. I finished that year in a physical therapist's office learning what actual support means, and I have been annoying about chair posture ever since.
Now I coach full time, and part of the job is making sure my players sit properly, because back pain ends careers earlier than bad aim does. I keep a checklist. Adjustable lumbar or it does not count. Tilt you can lock at a healthy angle or it does not count. Armrests that move in more than one direction or it does not count. The gear recommendations in this article are here because they have the adjustment range the sequence below requires, not because they look good in a thumbnail.
How I picked and how I tested
This is a setup guide, not a ranking of every chair on the market. Two chairs are in it because they clear the bar that matters: enough adjustment to actually fit a body, rather than one fixed shape you either match or you do not.
When I evaluate a chair for my team, I check the same four things in the same order. First, lumbar support: is it adjustable up and down, and does it have real depth control, or is it a decorative bump sewn into the backrest? Second, tilt: can I set the tension and lock the recline at the angle that keeps my hips open? Third, armrests: how many axes do they move on, because two directions is a decoration and three or four is a tool. Fourth, materials and fit: mesh versus foam for heat and pressure, and whether the seat depth and weight rating actually suit the person sitting in it.
Everything below is judged against that list. Where a chair has a caveat, I say so, because a chair that fits me at 5 foot 10 is not automatically the chair that fits a 6 foot 4 player who carries more weight.
Chairs that can take the adjustment
Both of these have the range the setup sequence needs. One is mesh, one is padded, and the choice between them comes down to how long you sit and how hot your room gets.
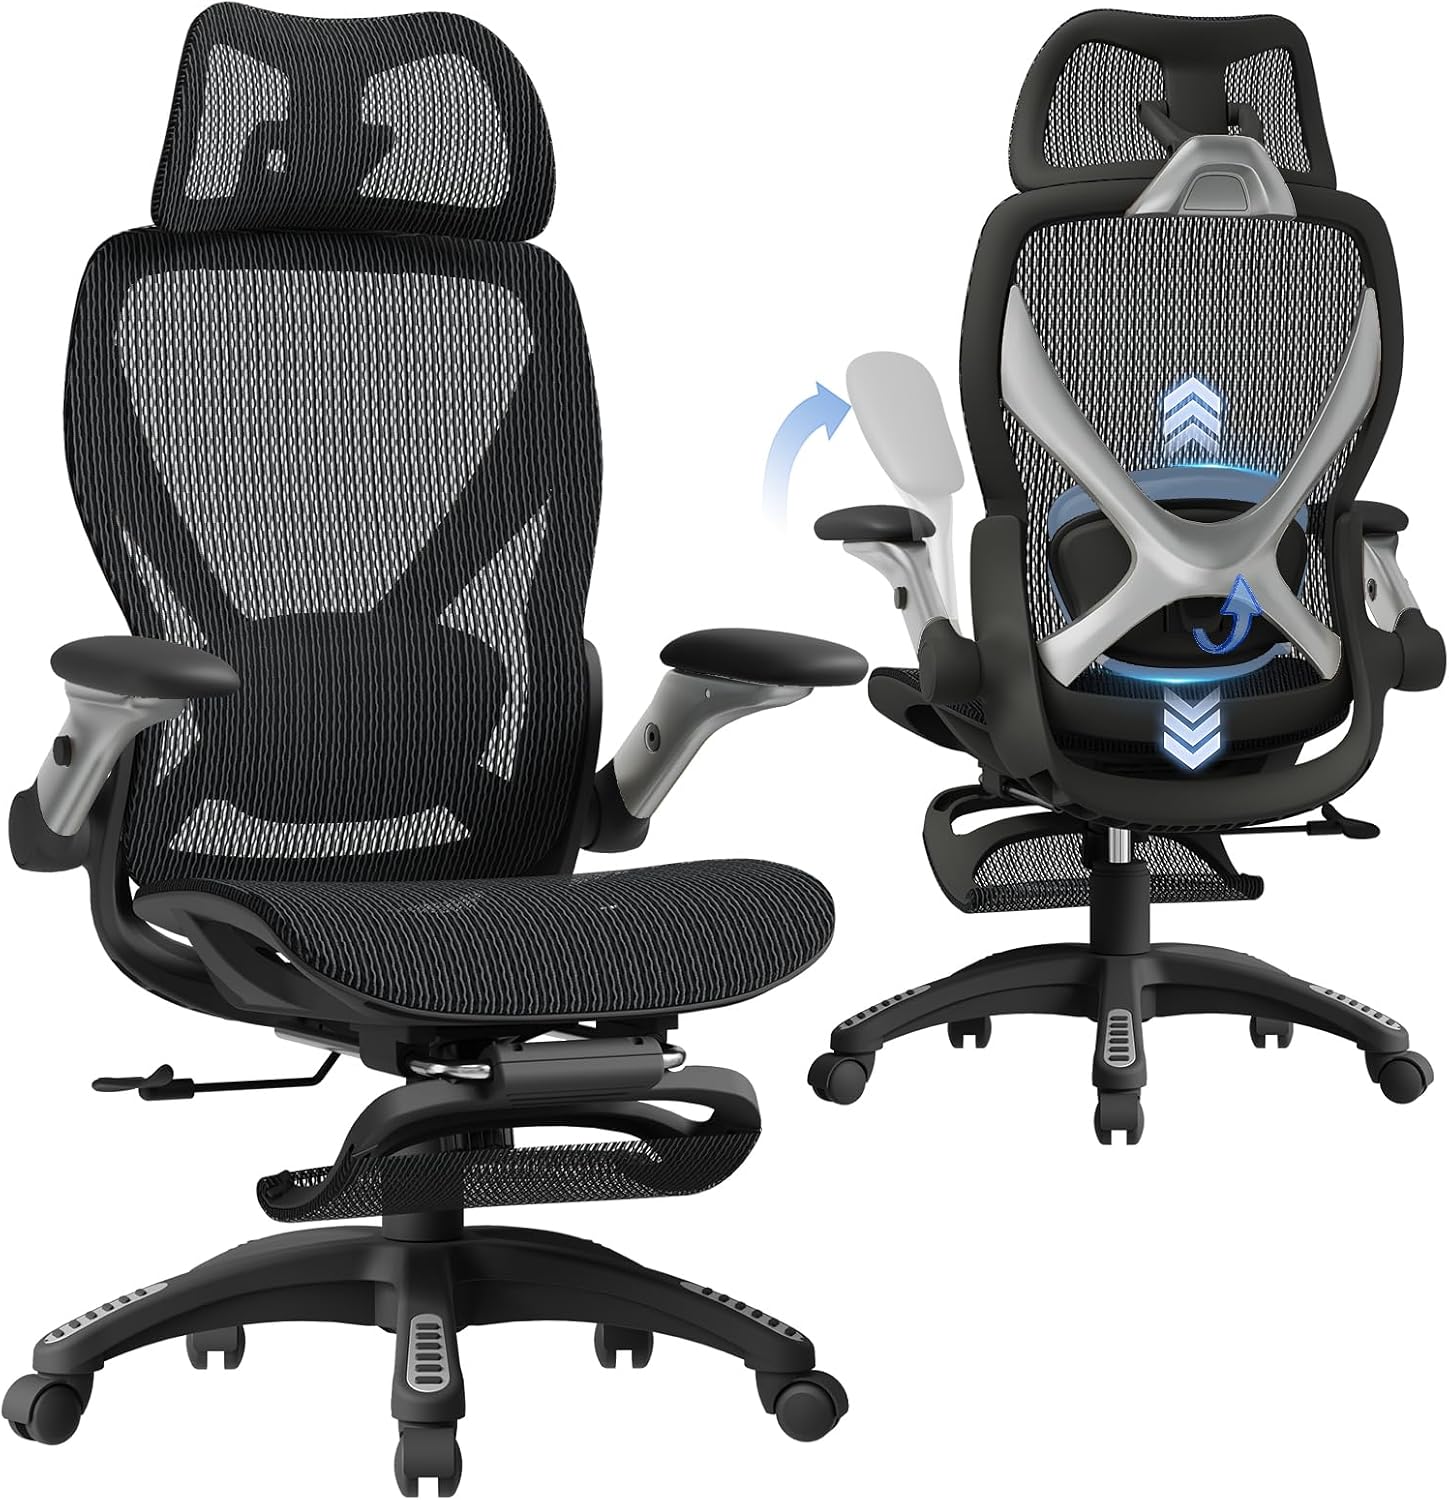
The mesh pick: ELABEST X100 Ergonomic Mesh Office Chair with Footrest, Big and Tall Home Desk Chair with 5D Flip-Up Arms, Adjustable 3D Lumbar Support, Gaming & Executive Computer Chairs
 Visit on Amazon →
This is the one I would hand to a player who grinds eight hours a day, and it is the one that lines up most cleanly with the checklist. The lumbar support is described as adjustable 3D, which is the whole ballgame. A lumbar pad you can move in three directions means you can put the curve where your spine actually curves instead of where a factory in 2019 decided everyone's spine curves.
The arms are listed as 5D flip-up, which matters for two reasons. Multi-axis arms let you set elbow height without shoving your shoulders forward, and flip-up arms let you get the chair fully under a desk when you are not sitting in it, which is a real benefit in a small apartment or a shared practice room. The mesh back and seat are the right call for long sessions in a warm room, because foam traps heat and heat makes you shift, and shifting is how posture falls apart at hour four.
Flaws but not dealbreakers: Mesh seats have an edge, and if the seat depth is set too long you will feel that edge behind your thighs. Set the depth before you judge the cushioning. Big and tall sizing also means this chair is physically large, so measure your desk opening and your floor space before it arrives.
Anyone who runs marathon sessions, runs hot, or shares a room with other people should start here.
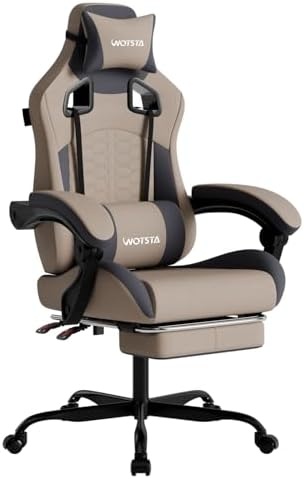
The padded pick: Gaming Chair with Massage, Ergonomic PC Gaming Chair with Footrest, Comfortable Headrest and Lumbar Support, High Back, 300LBS (Grey)
 Visit on Amazon →
This is the chair for someone who wants padding, a high back, and a headrest, and who is willing to do the setup work to make a foam chair behave. It ships with a footrest, a headrest, lumbar support, and a massage function, and it is rated to 300 pounds, which puts it in a sturdier class than the flimsy racing frames that wobble by month six.
Two honest notes, because this is where people get burned. First, the massage feature is a comfort feature, not a support feature. It will not fix a bad setup, and no amount of vibration substitutes for getting the lumbar curve in the right spot. Second, the listing describes lumbar support but does not promise it is adjustable, so before you buy, confirm how the lumbar piece moves. My rule is simple: a lumbar pad you cannot reposition is decoration, and decoration does not hold your lower back at hour six.
Flaws but not dealbreakers: Foam runs warmer than mesh over a long session. If you play in a room without good airflow, plan on a break cadence and a lighter shirt.
Anyone who wants a padded, high-backed chair with a headrest and a footrest for reclined sessions should look here.
The actual setup sequence
Do these in order. Each step depends on the one before it, and doing them out of order is why so many people end up with a chair that feels wrong no matter what they try.
Step one: seat height. This comes first because everything else is measured from it. Sit down and raise or lower the chair until your feet are flat on the floor and your knees are bent at roughly 90 degrees, or slightly more open than 90. Your hips should be level with your knees or slightly above them. If your hips are below your knees, you are sitting in a bucket, and your lower back is already rounding.
Step two: seat depth. Slide your hips all the way back until your lower back touches the backrest. You want two to three fingers of space between the back of your knee and the front edge of the seat. Too long and the edge digs into your calves and pulls you forward. Too short and your thighs hang off the front, which puts all your weight on your sit bones with no support under the thighs.
Step three: lumbar. Find the inward curve of your lower back, the small of it, and put the lumbar pad there. Not in the middle of your back. Not at your belt line. If your chair has adjustable lumbar, this is the moment you use it, and it is worth spending five minutes on, because the wrong placement is worse than no pad at all. Once it is set, sit back into it and feel whether your spine stays neutral or gets pushed into a curve.
Step four: tilt tension and recline. A locked 90-degree hip angle is not a healthy sitting position for eight hours. Set the tilt tension so you can lean back to roughly 100 to 110 degrees at the hips, then lock it there if your chair allows. That open angle takes load off the discs in your lower back. If the chair leans back on its own the second you relax, the tension is too loose.
Step five: armrests. Set the height so your elbows rest at about 90 degrees with your shoulders down and relaxed. Then use the other axes. Move the armrests inward or outward until your forearms are parallel and your shoulders are not rolled forward. This is the step almost everyone skips, and it is the step that decides whether your upper back aches by hour five. If your armrests only go up and down, get them close and accept that you are compromising.
Step six: footrest. Both of the chairs above include one. Use it as a position changer, not as a way to slouch. When you recline, deploy the footrest, but keep your hips pushed back into the seat so your lumbar stays in contact with the pad. The second your hips slide forward, the lumbar support is doing nothing and you are just reclined with a curved spine.
Step seven: headrest. The headrest should meet the base of your skull and the top of your neck, not push your chin forward. If it tips your head down, it is too low or too far forward. Your ears should sit roughly over your shoulders when you are relaxed against it.
Step eight: the break cadence. No chair setup survives eight hours without movement. Stand up for two minutes every 30 to 45 minutes. Between matches, between rounds, between queue times. This is not optional and it is not a chair feature. Static posture, even good static posture, is the thing that hurts you.
Why the usual suspects lose
The chairs that fail this sequence fail in predictable ways, and it is worth knowing the failure modes before you buy anything.
Racing-style bucket seats lose because the bolsters push your shoulders and hips forward into a rounded position. A bucket seat belongs in a car, where cornering forces hold you in. At a desk there are no cornering forces, so the bolsters only do one thing, which is ruin your posture.
Chairs with a fixed lumbar bump lose because a bump that cannot move is a shape, not support. It either lands on your curve by luck or it does not, and for most people it does not.
Chairs with one-dimensional armrests lose because elbow height alone does not solve shoulder position. You need in and out, and ideally angle, to keep your forearms parallel without rolling your shoulders forward.
And chairs that wobble after six months lose because a chair that shifts under you makes you brace, and bracing is its own posture problem. Weight rating and frame quality are not marketing numbers, they are the difference between a chair that holds a position and a chair that slowly gives up on you.
What this all costs
The setup itself is free. Fifteen minutes, a wall or a mirror to check your side profile, and a willingness to adjust the same chair three times until it feels right. That is the entire investment.
The chairs are the only real cost, and both are priced on Amazon, so check the current listings for the mesh ELABEST X100 and the padded massage chair before you commit. What I would tell you is that the price matters less than the adjustment range. A cheaper chair with adjustable lumbar, lockable tilt, and multi-axis armrests will beat an expensive chair with a fixed shape every single time, because the expensive one can only fit the body it was molded for.
Set the height. Set the depth. Put the lumbar pad where your spine actually curves. Open your hip angle. Get your elbows level and your shoulders down. Stand up every 45 minutes. Do that, and the chair you already own gets better today, and the chair you buy next gets chosen for the right reasons.