Most people unbox a chair, bolt the base on, drop the gas lift to whatever feels right for the first thirty seconds, and never touch another lever. That is the whole problem. A proper ergonomic gaming chair setup is not about assembly. It is about the ten minutes after assembly, when you dial in seat depth, lumbar height, tilt lock, and armrest width to your actual body. Skip those ten minutes and a premium chair performs like a cheap one.
I am Jae. I coach esports in Los Angeles and I spent ten years before that grinding ten-hour practice days as a competitive FPS player. I have gone through more chairs than I have trophies. One collapsed mid-match. One gave me a herniated disc scare at 24 that ended a teammate's career and nearly ended mine. So when I say setup matters more than the box, I am not being dramatic. I have watched a bad seating position take a player off a roster.
The good news is that almost every chair that is worth owning can be adjusted into a healthy position. The bad news is that most people never find it, because nobody tells them what each lever is for. That is what this guide is.
Why you should trust me
I run the same posture check on every player on my roster, and I run it on every chair that comes through our practice space. Ten years of competitive play taught me exactly which parts of a chair fail the body first: the lumbar curve that sits two inches too high, the seat pan that cuts off circulation behind the knee, the armrests that force the shoulders forward into a hunch.
My rule is simple. A gaming chair is a chair first and a gaming product second. If it does not support your back for hour six, it is a toy. Everything below comes from that lens, and I will tell you plainly when a feature is decoration rather than support.
The four checks that decide whether a chair is worth setting up
Before you spend ten minutes adjusting anything, you need to know whether the chair can be adjusted at all. These are the four things I check on any chair, at any price.
Check one: Is the lumbar support adjustable?
Adjustable is mandatory. A fixed bump molded into the backrest is decoration. It hits one spot on one body type and misses everyone else, and if it lands above your lumbar curve it will push your pelvis forward and make the slouch worse.
What you want is a lumbar pad that slides up and down, and ideally one that changes depth too. If the spec sheet does not say adjustable, assume it is fixed.
Check two: Does the tilt lock?
Tilt tension and a tilt lock are the difference between a chair that supports you and a chair that slowly reclines you into a shrimp. You need to be able to lock the backrest at an angle where your hips stay above your knees and your lower back stays in contact with the pad.
Then, for long sessions, you want to unlock it with enough tension that the chair rocks slightly with your movement. That micro-motion keeps your spine from locking into one position for eight hours.
Check three: Do the armrests move in more than two directions?
Armrests that only go up and down are not serious. You need height, width, forward and back, and ideally angle. The goal is to get your forearms supported at roughly desk height with your elbows tucked near your ribs, not flared out to the sides.
If your shoulders round forward to reach the mouse, the armrests are the culprit more often than the desk is.
Check four: Does the seat depth match your thigh length?
Seat depth is how far the pan extends. Too long and the front edge presses into the back of your knee, which cuts circulation and pushes you into a slouch. Too short and your thighs hang off the front with no support.
The test is simple. Sit all the way back against the backrest. You should have two to three fingers of space between the front edge of the seat and the back of your knee. If you cannot get that, the chair is the wrong size for you, no matter how good the lumbar pad is.
Two chairs that pass the checklist
You do not need to spend a fortune to sit correctly, and you do not need to spend a fortune to get mesh either. These are the two I point people toward depending on budget and how many hours a day they are in the seat.
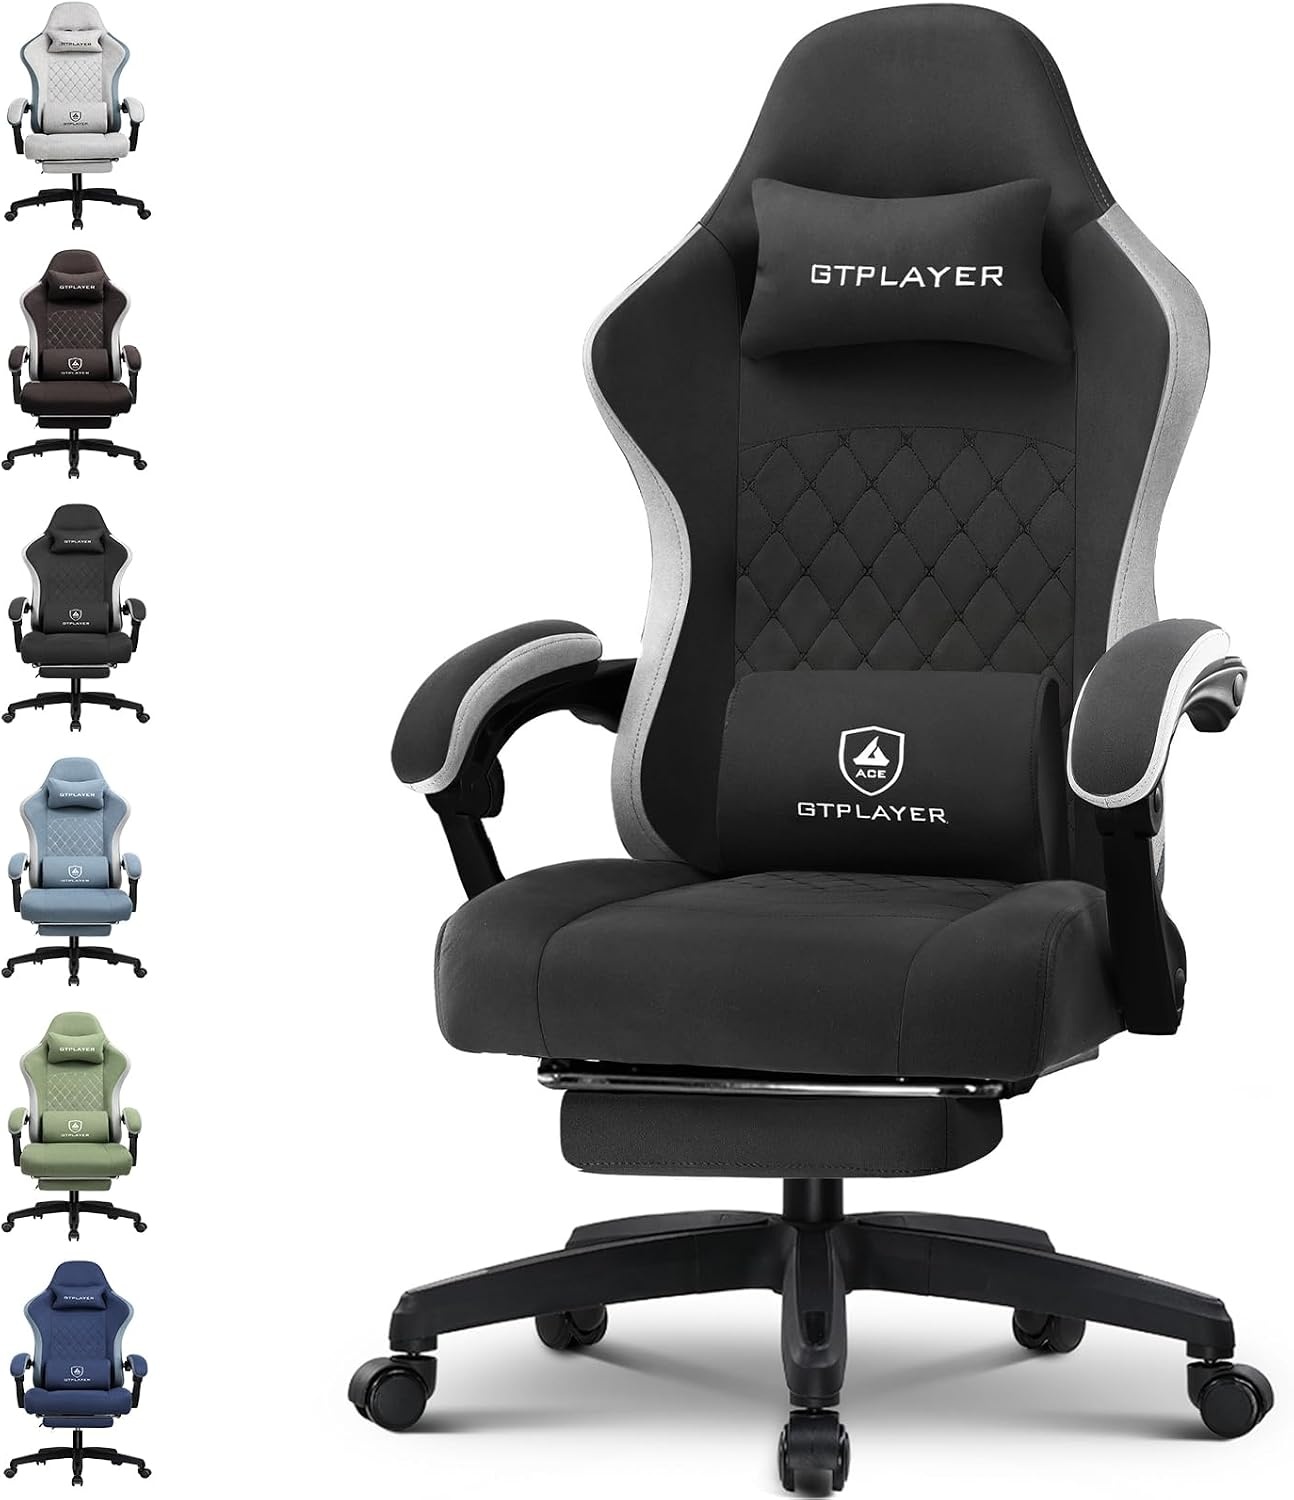
Budget pick: GTPLAYER Gaming Chair, Computer Office Chair with Pocket Spring Cushion, Linkage Armrests and Footrest, High Back Ergonomic Computer Chair with Lumbar Support Task Chair with Footrest(Black)
 Visit on Amazon →
This is the chair I hand to a player who is buying their first real setup and cannot justify a premium spend yet. The high back gives you a full spine to lean into, and the built-in lumbar support gives you something to work with, which is more than the racing-style shells at this tier usually offer. The pocket spring cushion is the part that matters for long sessions. Coil-and-foam construction like that tends to hold its shape better than a slab of cheap foam, which is what usually flattens out on budget chairs after a few months of eight-hour days.
The footrest is genuinely useful if you recline to watch VOD or take a call, though you should not be using it while you are actively playing. Feet flat on the floor is the correct position for aim and for your lower back.
Flaws but not dealbreakers: The linkage armrests move with the backrest rather than adjusting independently. That is a real limitation, and it means you cannot dial in arm angle the way you can on a four-dimensional armrest. You can still set the height and get your forearms supported, which is the part that protects your shoulders. Just know what you are buying. If independent armrest adjustment is non-negotiable for you, this is not the chair, and that is fine.
Anyone playing three to five hours a day who wants a tall back, a real cushion, and a place to put their feet will get their money's worth here.
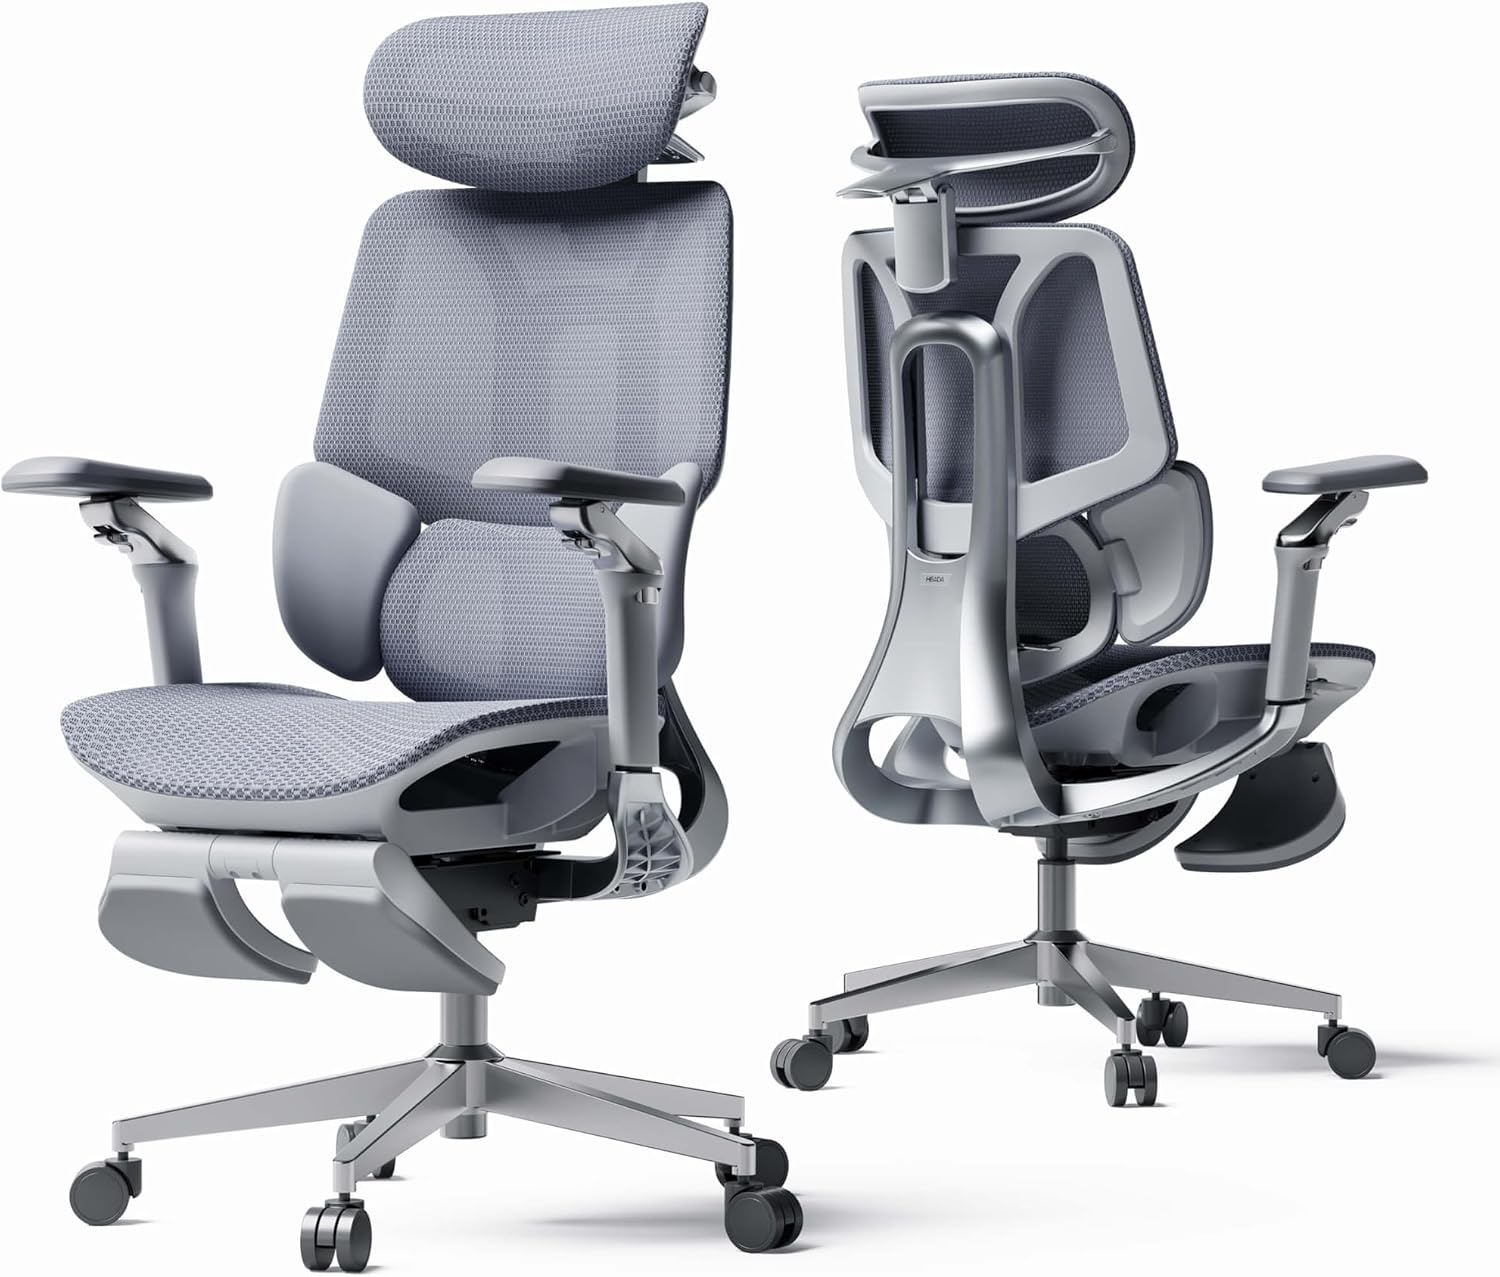
Upgrade pick: Hbada E3 Pro 2026 Edition Ergonomic Office Chair, Mesh Desk Chair with 3-Zone Floating Lumbar Support, Upgraded 4D Headrest, 720° Armrests, Grey with Footrest
 Visit on Amazon →
This is the chair for someone who lives in the seat. The back is mesh, and for anyone playing more than two hours a day that matters more than any other material decision. Mesh moves air. Foam and leather trap it. In a Los Angeles summer with the door closed and the PC dumping heat into the room, a mesh back is the difference between finishing a scrim block and quitting early because your shirt is soaked.
The 3-zone floating lumbar support is the headline feature, and it is the one I care about. Floating means it tracks your back as you move rather than sitting in one fixed spot, and three zones means the pressure is distributed instead of concentrated on a single point. Combined with the 4D headrest, which adjusts in more directions than a headrest needs to in most chairs, and 720 degree armrests that rotate and slide into a real position, this is a chair you can set up for your body rather than adapting your body to it.
Flaws but not dealbreakers: Mesh has a firmer feel than foam, and some people miss the sink-in softness of a padded seat on day one. Give it a week. The support is the point, and the firmness is what keeps your hips from sliding forward over a long session.
Anyone treating this as a full work-and-play station, eight hours of scrims plus whatever they do for a living, should be looking here first.
The setup workflow, step by step
Now the part that actually changes how your back feels tomorrow. Do this once, in this order, and write down where the levers ended up so you can find it again after someone else sits in your chair.
Step one: Set seat height first. Stand next to the chair and raise the gas lift so the top of the seat pan sits roughly at the crease behind your knee. Sit down. Your feet should be flat on the floor and your thighs should be roughly parallel to it, maybe a hair above level. If your feet dangle, the chair is too tall. If your knees sit above your hips, it is too low.
Step two: Set seat depth. Push your hips all the way back until they contact the backrest. Now check the gap behind your knee. Two to three fingers. If the pan is fixed and the gap is wrong, you can fake it with a lumbar cushion behind your hips, which pulls you forward on the seat. It is a workaround, not a fix, but it works.
Step three: Set lumbar height. This is the one everybody skips. The lumbar pad should sit in the small of your back, right at the inward curve above your belt line. Slide it up and down until you feel contact there while sitting up straight. If it is pushing into your mid back, it is too high, and it will make you lean forward all day.
Step four: Set backrest angle. Start at roughly 100 to 110 degrees from the seat, which is slightly reclined, not upright. Lock it there. Fully upright feels disciplined and is actually harder on your lower back over hours, because it removes the natural curve. If you have a footrest, this is the angle where it becomes useful.
Step five: Set armrest height. Let your arms hang, then raise the armrests until your forearms rest with your elbows bent just past 90 degrees and your shoulders relaxed and down. If your shoulders climb toward your ears, the armrests are too high.
Step six: Set armrest width and angle. Bring them in until your elbows sit close to your ribs, then angle the pads so your forearms lie flat with your wrists straight. If you have to bend your wrist up or down to reach the keyboard, the armrest is fighting you.
Step seven: Set headrest height. The headrest should meet the base of your skull, not the middle of your head. If it pushes your chin down, it is too low. If your neck has to crane back to touch it, it is too high.
Step eight: Set tilt tension. Unlock the tilt and lean back. The chair should resist you enough that you are not fighting it, but give enough that you can move. Tighten the tension knob until it feels like that. If you can lock the tilt at your working angle and only unlock it for breaks, that is the pattern I coach.
Step nine: Adjust the footrest and use it correctly. The footrest is for breaks, VOD review, and calls. Not for ranked. When you are playing, feet flat, knees at 90 degrees, weight through the whole foot.
Step ten: Move every twenty minutes. No chair fixes stillness. Stand up, walk to the kitchen, do a hip flexor stretch. The best setup in the world loses to eight straight hours in one position.
Caveats and what to skip
Do not buy a bucket-seat racing design for a desk. It is a car seat bolted to a base, and it locks your shoulders forward and your hips into a fixed angle that belongs behind a steering wheel, not in front of a monitor.
Do not buy a chair with a fixed lumbar bump and tell yourself you will get used to it. You will not. You will slouch around it.
Do not ignore the base. A chair that wobbles after six months is a chair that will fail, and a wobble you compensate for with your core all day is a slow injury.
And do not assume that the adjustment you set on day one is right forever. If you change desks, monitors, or the amount you play, revisit the setup. It takes four minutes.
What you are paying for
At the lower end you are buying a tall back, a real cushion, and a lumbar pad you can live with. That is enough to sit correctly if you do the setup work, and it is a legitimate choice for three to five hour days.
At the higher end you are buying the things that matter for marathon sessions: a breathable mesh back, a lumbar system that moves with you instead of sitting in one spot, and armrests that adjust in enough directions to actually fit your frame. Those features are not cosmetic. They are the difference between a chair you can set up once and forget and a chair you fight every evening.
Either way, check the current Amazon price on the listing before you commit, and read the height and weight fit guidance carefully. A great chair in the wrong size is a bad chair.
The short version
Set the height so your feet are flat, the depth so your knees clear the pan, the lumbar so it lands in the small of your back, and the armrests so your shoulders can drop. Lock the tilt for play, unlock it for breaks, and stand up every twenty minutes.
That is the entire job. The chair is only half of it. Your back is the other half, and it has to last a lot longer than the chair does.